Updated - May 2, 2026 - Copyright - Ralph Gibson - 2014

Other Projects
Included on this page are a number of miscellaneous projects. Please click on an
image for a larger view.
2025 Christmas Ornaments Project:
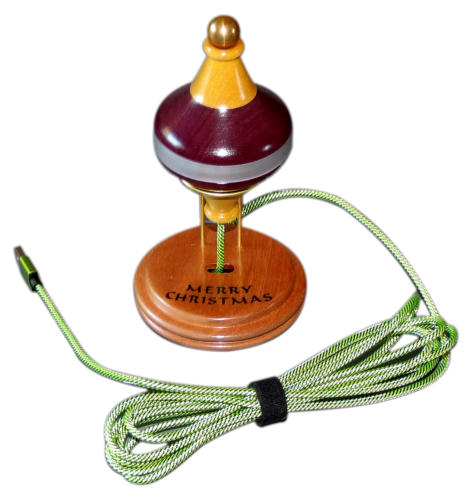
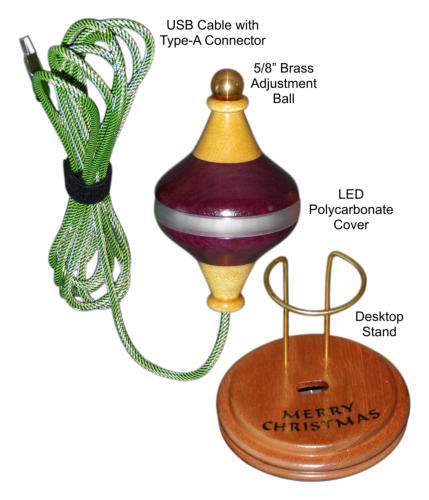
I created two Desktop Christmas Ornaments, for the Annual Turners Warehouse
Ornament Contest and Charity Auction in 2024 and 2025. The annual charity
auctions benefit St. Jude Children’s Hospital, and run in early December. Please
check the Turners Warehouse website for more information.
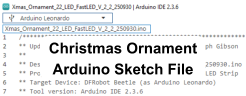
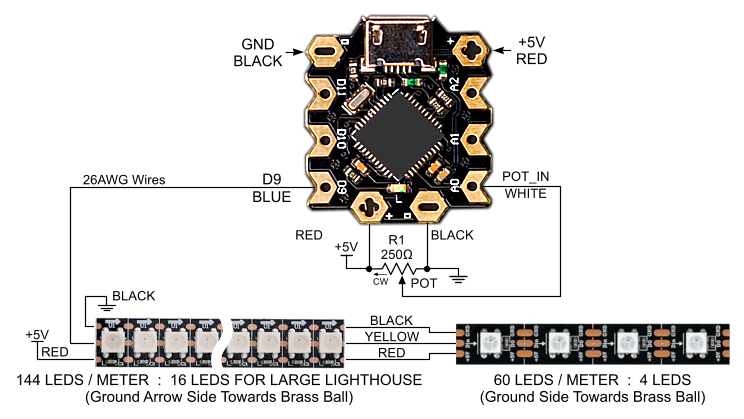
The ornaments use a DFRobot Beetle controller card, that is programming compatible with the Arduino
Leonardo controller card. For programming the Beetle based on the ATMEGA32U4 device, part number
DFR0282, I used the Arduino IDE version 2.3.6. The software running on the ornaments allow multiple
LED display modes to be selected. The icons above link to an ornament user guide and design file in PDF
format, that describe how to use the ornament, and how the ornament was designed. When power is
applied to the ornament USB cable, the LEDS blink to indicate which software version is programmed on
the ornament Beetle card. My background is hardware design engineering, so apologies in advance if the
software isn’t very elegant.
The images included above link to photos of the ornaments that were created. They also link to the
Beetle hardware design schematic, the design document in PDF format, and the Arduino sketch file
program in .zip format, that runs on the Beetle controller card.
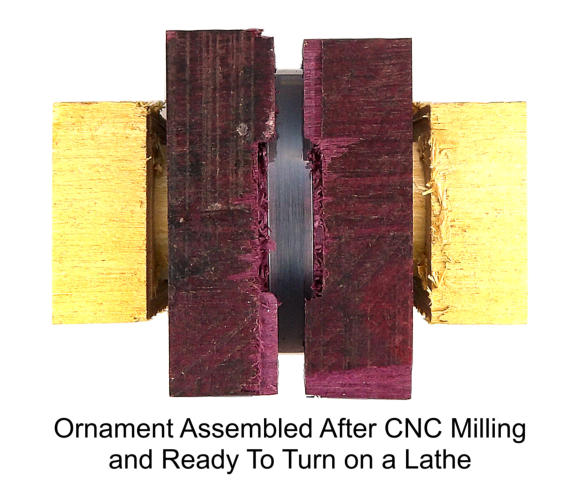
The ornaments include 22 RGB LEDS in a strip, that shine through a polycarbonate ring. Each of the 22
RGB LEDS are individually programmable, allowing excellent control of the LEDS. The ornaments are built
in four sections, with the top and bottom sections each glued to the upper and lower center sections. The
two center sections are then coupled together with 3/16” magnets.
There is also a link included to the CNC milling files used to create the ornaments, which were done in
Vectric VCarve-Pro version 10.5.
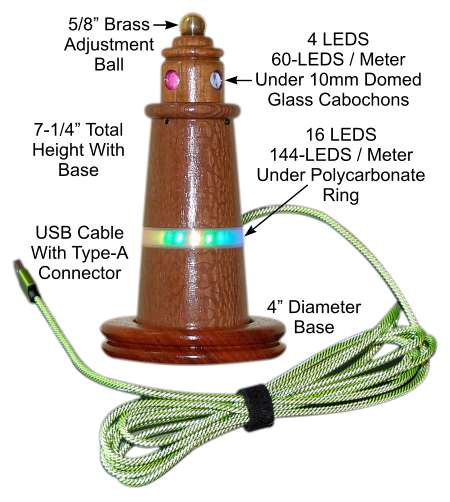
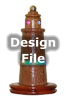
2025 Large Lighthouse Project:
I designed a small lighthouse as a new desktop ornament, with a feature set similar to the Desktop
Christmas Ornament. The lighthouse shown in the images below, stands about 7-1/4” tall, including the
base which has a 4” diameter. The Beetle Micro-Controller Card and RGB LED strips are the same as used
in the Christmas Ornaments.
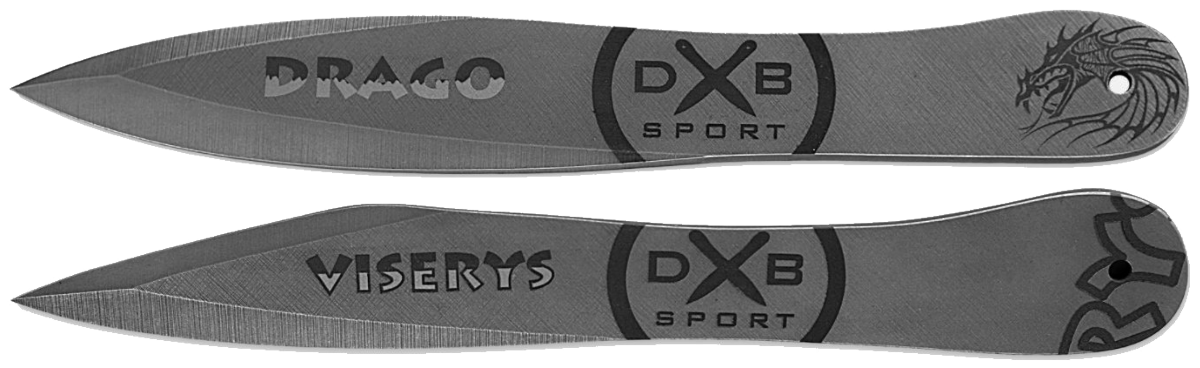
Knife Throwing Hobby:
After watching YouTube videos on No-
Spin Knife Throwing, I decided to give it
a try. Following a review on YouTube by Adam Celadin, I purchased two
sets of throwing knives from DXB-Sport. These are very nice heavy duty
steel knives about 10” in length, and just under 1/4” thick. One of the
best tutorials I’ve seen on YouTube was created by Samoth Chipmah, “No
Spin Knife Throwing Tutorial”. A nice feature of the tutorial, is that there is an index in
the description, showing at which point in the video different topics are located.
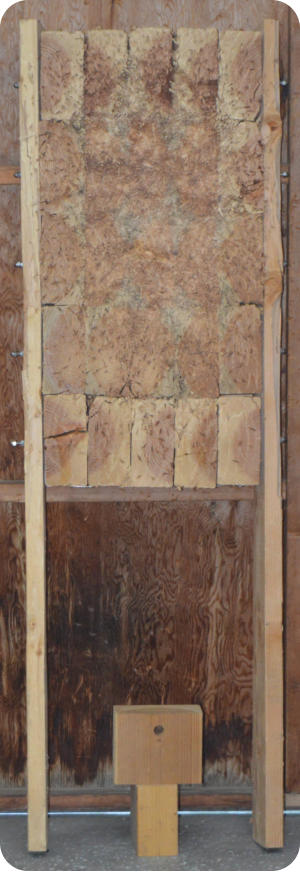
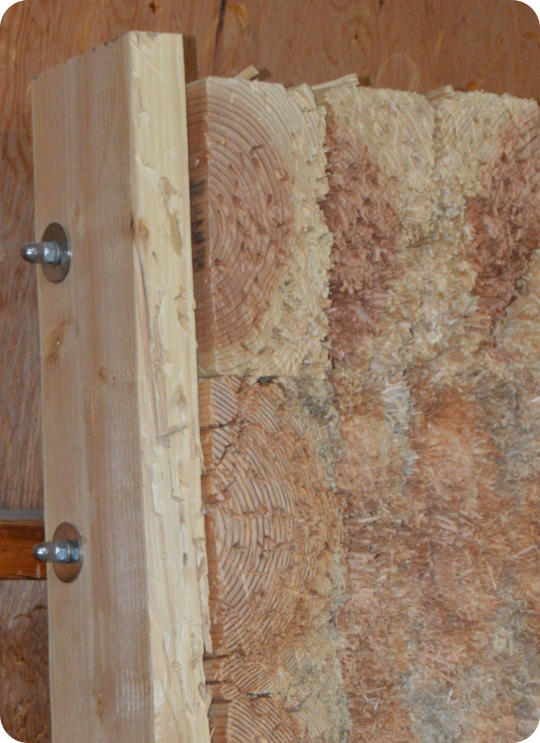
I started out trying to throw into a pine plank that I had as a target, with little luck. So I
made an end grain throwing target out of regular 4” x 8” lumber. I based the design on
an example April Wilkerson showed in her YouTube video, “Making an End Grain Knife
Throwing Target”. In this design the blocks that make up the target are not glued
together, and can be removed and replaced as necessary. My target is somewhat larger,
with five rows x five columns of 4” x 8” segments, each 6” in length. This results in a
throwing target about 18” x 37” overall. Each block has a 7/8” hole drilled through as
shown, to pass a length of 1/2” PVC pipe. Each row of blocks, has a length of 5/16”-18
threaded rod passed through the PVC pipe. The ends of the threaded rod are secured with 5/16” over-
sized washers, Nylon Lock Nuts, and Cap Nuts.
Ice Mold for 24 oz. Thermal Glass:
Since I prefer to drink water cold, I decided to create a stainless steel mold for a large ice
cube for a 24 oz. thermal glass.
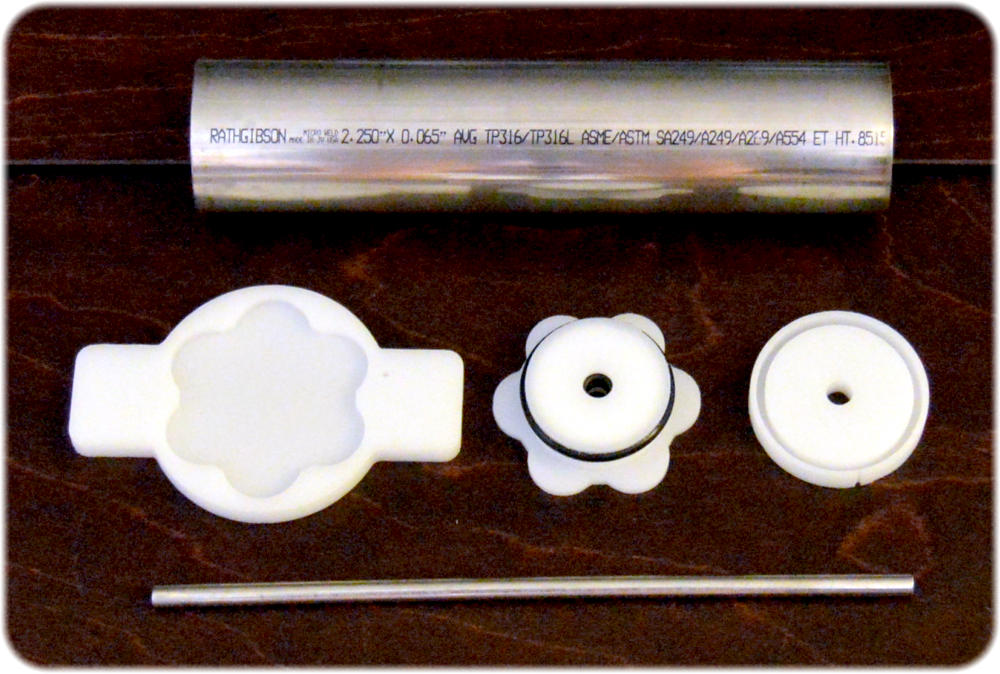
Top Image: At the top of the first image is a 2-1/8” ID x 2-1/4” OD stainless steel tube.
The HDPE parts in the center were fabricated on my CNC mill. On the left is a “wrench”
to help in removing the O-Ring base. In the center is the O-Ring base, and on the right is
a cap to keep a stainless steel tube centered while freezing. At the bottom of the image
is the 5/16” OD stainless steel tube which creates space in the ice cube for a plastic
straw. I tried to freeze the ice cube with a plastic straw in place, but the straw was
crushed by the ice while freezing. So far, the stainless steel tube used for the straw
channel works great.
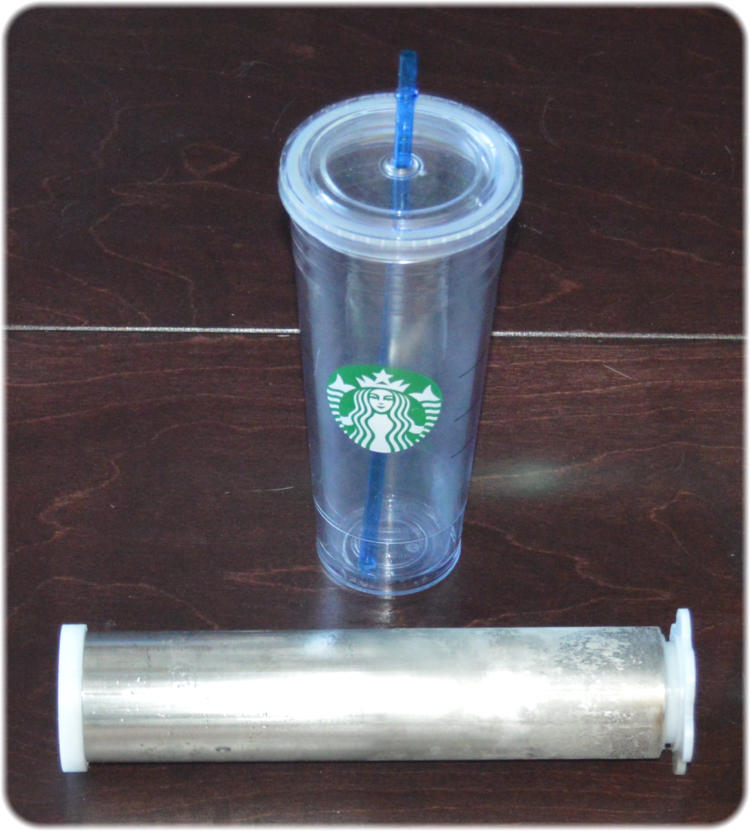
Center Image: To freeze the ice block, the mold is filled with water, set in a small bowl,
and placed in the freezer. Shown here is the 24 oz. glass and the ice mold removed from
the freezer. While freezing, the ice block expands pushing the O-Ring base, shown in the
right end of the tube, slightly out of the large stainless steel tube.
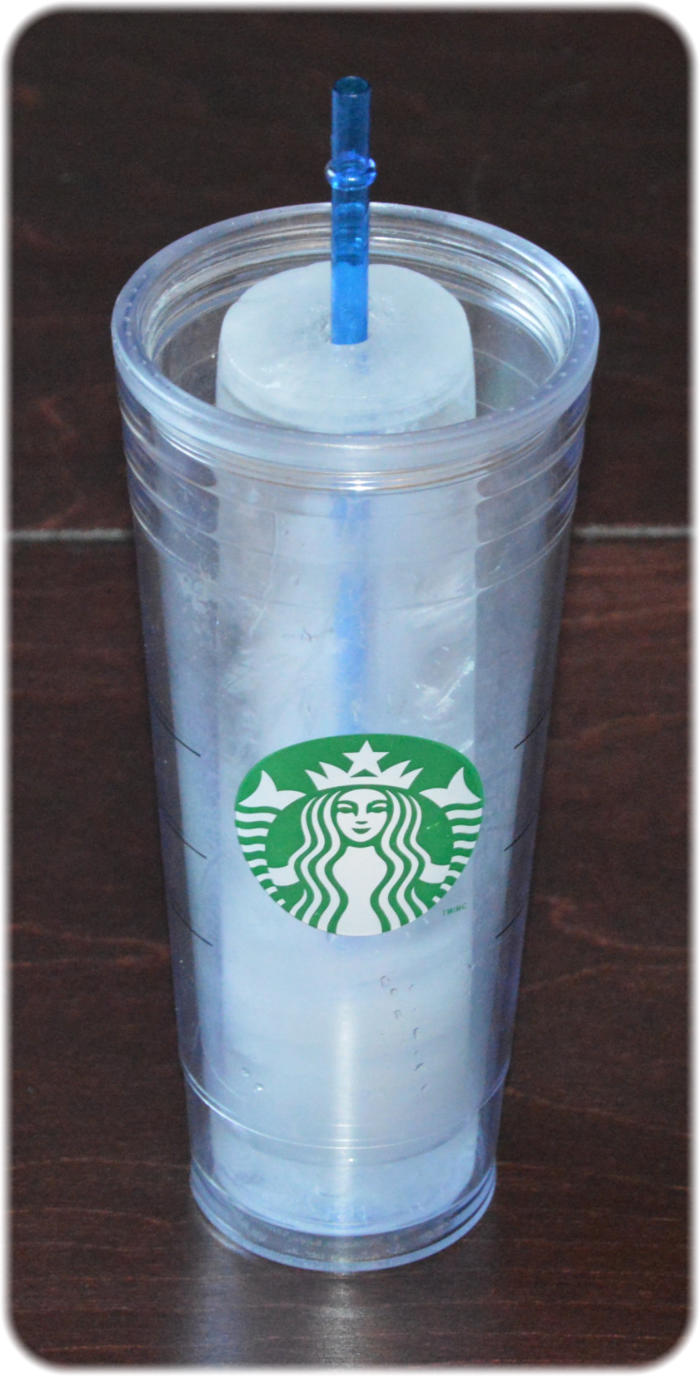
Bottom Image: If the ice mold is removed from the freezer and left on the counter for
30 to 45 minutes, the large stainless steel tube warms enough to allow the ice
block to slide out. After placing in the glass, it usually requires a few breaths
blown through the stainless steel tube, to warm it enough to remove the
stainless steel tube, to replace it with the plastic straw.