Updated - October 4, 2025 - Copyright - Ralph Gibson - 2014

A “How To” CNC Mill Project Example
Milling a Red Oak holder for my CNC spindle collets. Please click on an image for a larger view.
I finally bought a set of ER11 metric collets for my CNC milling machine. The new collet set runs from
1mm to 7mm in 1/2mm steps. I recently had a project that required using a very small drill, and the
1/16” collet, previously my smallest, simply couldn’t hold the drill that I needed to use. Here is an
example project where I used some scrap 3/4” red oak I had from a previous project. To mill a holder for
my collets, and two spare ER11 collet nuts. You can click on any of the images for a larger view.
Step 1: As a first step the collet block was created using Xara
Designer Pro X9. The drawing included the ER11 collet and nut
recesses, the text, and outside border of the block. The drawing was
exported as an Adobe Illustrator (.AI) file which VCarve-Pro could
import. VCarve-Pro generates the gCode files to drive the mill.
Step 2: After the .AI file is imported into VCarve-Pro, the milling
parameters are set. These include the mill bit to use, the depth of each
area to mill, and the size of the tabs to be included when the border is
milled. The VCarve-Pro simulation can be seen at right, with two of the
four tabs shown at the top and bottom. The text was milled with a 1/8”
30
o
V-Bit, and everything else was milled with a 1/8” end mill.
Step 3: In order to fill the text with black paint, and not have the paint soak into the
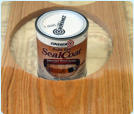
wood where it’s not wanted, the wood was prepared before milling. Zinsser Bulls Eye
Seal Coat, a Wax Free Shellac purchased from Home Depot, was used to prepare the
wood. The shellac works great as you only have to wait 30 to 45 minutes between
coats. Three coats were used to fill in the open grain of the red oak lumber.
Step 4: After the last coat of shellac has dried, the panel can be milled. The oak panel
is clamped to the mill table and the Mach3 CNC control application is launched on the
CNC mill PC. The gCode file to mill the text is loaded and a 1/8” V-Bit is installed in the
ER11 spindle collet. The ER11 spindle is set to run at 16,000 RPM, and the text is milled
into the wood. The 1/8” V-Bit is then removed and the 1/8” end mill is installed. The
spindle is run back up to 16,000 RPM and the collet and ER11 nut recesses and the
border are milled. The photo shows the milled block.
Step 5: In order to make the text stand out, a heavy body acrylic paint, purchased at
Michael’s Arts and Crafts Supplies, is used. The stray small wood fibers left over after
milling are removed from the milled areas. Then, as shown in the picture, a small
rubber spatula is used to press the heavy paint into the text. The shellac prevents the
ink from soaking into the adjacent areas of the wood.
Step 6: A small router is used to round off the top and bottom
edges of the block, and then the block is sanded and varnished.
Sanding removes the excess paint around the text left over from
applying the black paint. Or the top of the block can be shaved
off in the mill, instead of simply sanding off the excess paint.
After the block is sanded, two coats of water based polyurethane
semi-gloss varnish, are applied to finish the block.
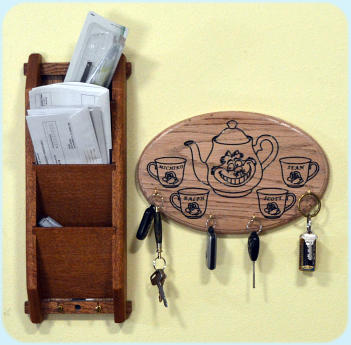
Key Holder: This project was an oval key holder for the
kitchen. For this project, a 3/4” router bit was used with the
CNC mill to flatten the red oak surface before the shellac was
applied. Three coats of shellac were added, and the images
and boarder were milled. Two coats of black paint were
applied and allowed to dry without removing the oval from the
mill bed. The same 3/4” router bit was then used to remove a
thin (0.025”) top layer of the red oak oval to remove the
excess black paint. This worked much better than sanding off
the excess paint, as the paint tends to clog the sand paper
which needs to be cleaned often. The oval was then routed,
sanded, and varnished to finish.


